Feature Stapling in SharePoint
I want a custom list to be created by default whenever a site is created using the Team Site template. The best way to do this is to create a Feature Stapling.
Feature Stapling
Feature Stapling can be created for the site definition that is already in use. Feature Stapling has two features.
Feature Stapling
Feature Stapling can be created for the site definition that is already in use. Feature Stapling has two features.
- Stapler feature: staples another feature to the site definition
- Staplee feature: that which will be stapled
Steps involved
The following is the procedure steps to to implement Feature Stapling in SharePoint:
The following is the procedure steps to to implement Feature Stapling in SharePoint:
- Create Empty SharePoint Project
- Create a feature
- Create the feature stapler
- Create FeatureAssociation.xml
- Deploy the solution
- Check whether the feature stapler is activated in a web application
- Testing
Create Empty SharePoint Project
- Open Visual Studio 2010 by going clicking "Start" then select "All Programs" | "Microsoft Visual Studio 2010" then right-click on Microsoft Visual Studio 2010 and click on "Run as administrator".
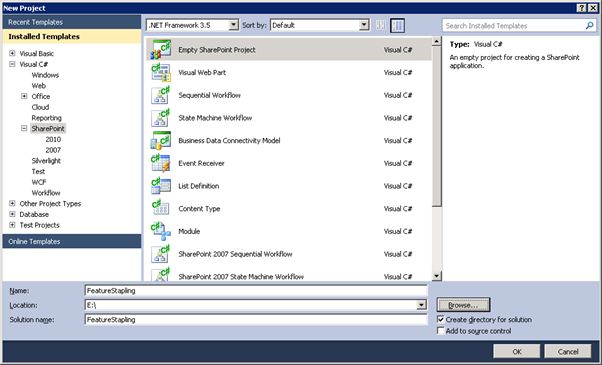
- Go to the File tab, click on "New" and then click on "Project".
- In the New Project dialog box, expand the Visual C# node, and then select the SharePoint 2010 node.
- In the Templates pane, select "Empty SharePoint Project".
- Enter the Name as FeatureStapling and then click "OK".
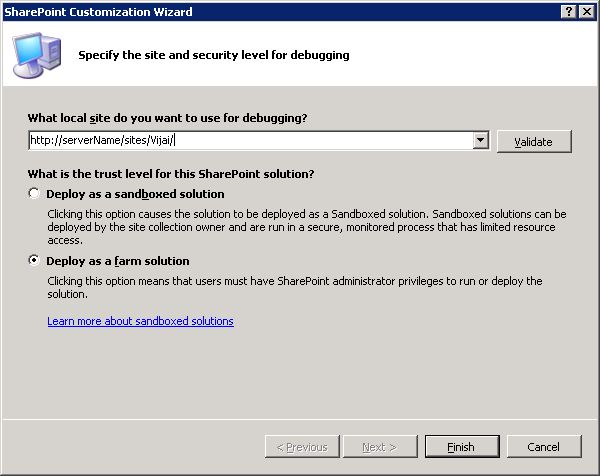
- Enter the local site URL for debugging, select "Deploy as a farm solution" as in the following and then click on "Finish".
Create a feature
In this section you will see how to create a new feature and feature receiver to create a custom list in the site.
In this section you will see how to create a new feature and feature receiver to create a custom list in the site.
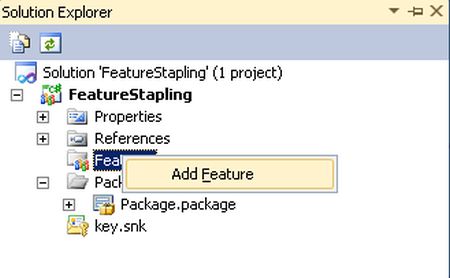
- In the Solution Explorer, right-click on the Feature folder and then click on "Add Feature".

- Rename the feature to "CreateListFeature".
- Double-click on the feature and enter the Title and Description for the feature.
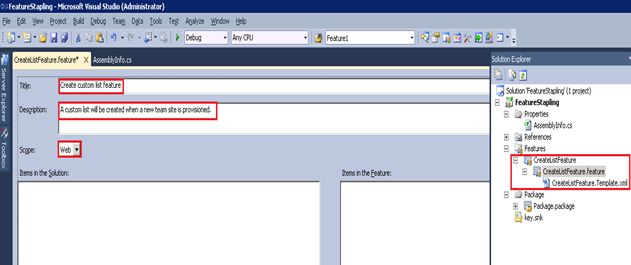
- Select the scope as web from the drop down list.
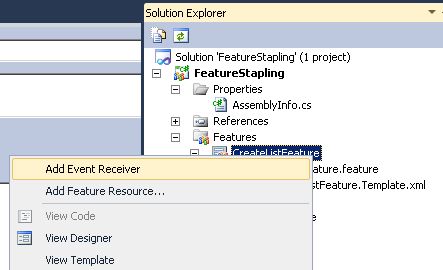
- Right-click on CreateListFeature and then click on the Add Event receiver.
- Double-click on CreateListFeature.EventReceiver.cs and replace the code with the following:
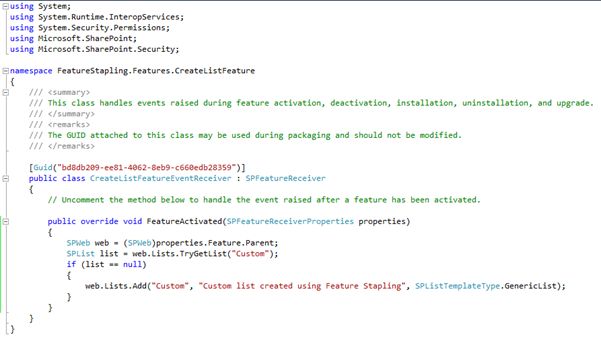
- The code above creates a custom list on the feature activated.
Create feature stapler
In this section you will see how to create a feature stapler that is used to staple the CreateListFeature to the site definition.
In this section you will see how to create a feature stapler that is used to staple the CreateListFeature to the site definition.
- In the Solution Explorer, right-click on the Feature folder and then click on "Add Feature".
- Rename the feature to "FeatureStapler".

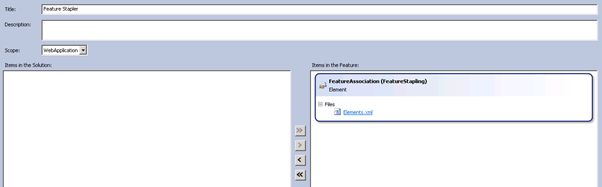
- Double-click on the feature and enter the Title and Description for the feature.

- Select the scope as WebApplication from the drop down list.
Create FeatureAssociation.xml
In this section you will see how to create the XML file to associate the feature to the site definition.
In this section you will see how to create the XML file to associate the feature to the site definition.
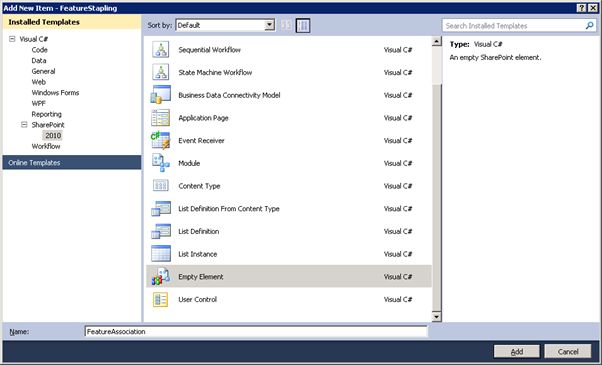
- In the Solution Explorer, right-click on the project, click on "Add" and then click on "New Item".
- Select the "Empty Element" template, enter the Name and then click on "Add".
- Double-click on Elements.xml and replace with the following:

Id - CreateListFeature feature Id.
Template Name: To which site template the feature should be associated (the format should be <site template name><configuration number>).
- Ensure this file is added to the FeatureStapler feature (double-click on the FeatureStapler feature and see whether in the "Items in the feature" window the Elements.xml file is available).
Deploy the solution
Right-click on the solution and then click on "Deploy Solution".
Check whether the feature stapler is activated in the web application:
Right-click on the solution and then click on "Deploy Solution".
Check whether the feature stapler is activated in the web application:
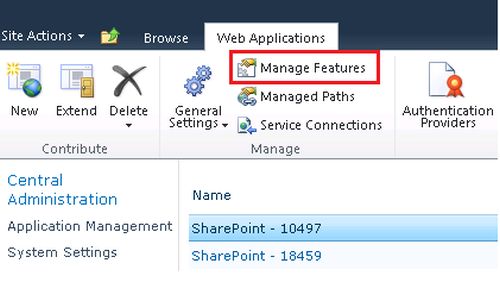
- Open Central Administration.
- Click on Manage Web Applications that is available in the Application Management section.
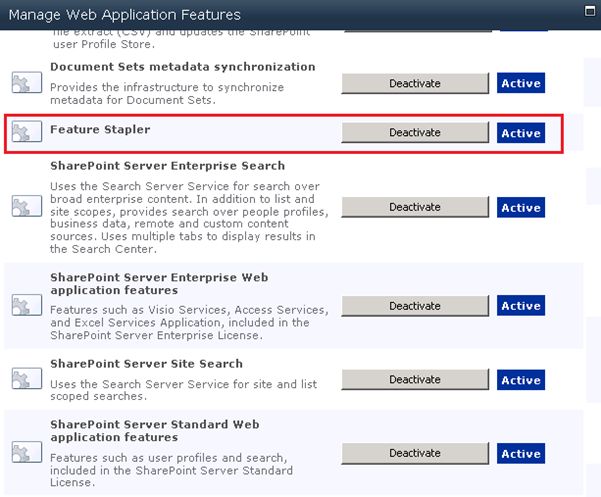
- Select the web application and then click on "Manage Features" in the ribbon interface.
- Check whether the Feature Stapler feature is activated.
Testing
- Open Central Administration.
- Click on "Application Management".
- Click on "Create Site Collections" that is available under the Site Collections section.
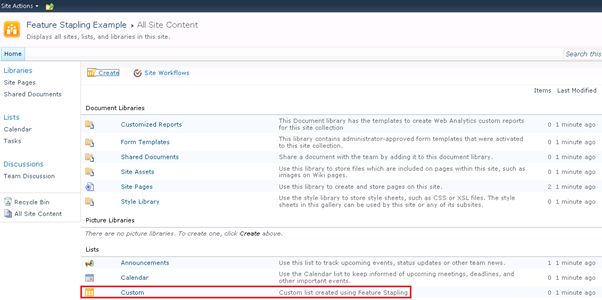
- Create a new site collection using the Team Site template.
- Navigate to the newly created team site.
- Click on "All Site Content" in the quick launch bar.
- You will see the custom list created by default.
Summary
Thus in this article we have seen an example for implementing the Feature Stapling in SharePoint.
Thus in this article we have seen an example for implementing the Feature Stapling in SharePoint.
No comments:
Post a Comment